SpringMVC
[toc]
1-概述
1.1-SpringMVC简介
Spring MVC是一个Java框架,用于构建Web应用程序。它遵循Model-View-Controller设计模式。它实现了核心Spring框架的所有基本功能,例如控制反转,依赖注入。
1.2-SpringMVC的优点
- 基于MVC架构分工明确
- 简单、易上手
- 与spring亲和
- 注解开发,方便
1.3-SpringMVC优化的方向
1.3.1-原有框架弊端
在早期 Java Web 的开发中,统一把显示层、控制层、数据层的操作全部交给 JSP 或者 JavaBean 来进行处理,我们称之为 Model1:

出现的弊端:
- JSP 和 Java Bean 之间严重耦合,Java 代码和 HTML 代码也耦合在了一起
- 要求开发者不仅要掌握 Java ,还要有高超的前端水平
- 前端和后端相互依赖,前端需要等待后端完成,后端也依赖前端完成,才能进行有效的测试
- 代码难以复用
于是衍生出了MVC架构

首先用户的请求会到达 Servlet,然后根据请求调用相应的 Java Bean,并把所有的显示结果交给 JSP 去完成,这样的模式我们就称为 MVC 模式。
1.3.2-SpringMVC的优化
为解决持久层中一直未处理好的数据库事务的编程,又为了迎合 NoSQL 的强势崛起,Spring MVC 给出了方案:

原有的模型被拆分为业务层和数据访问层,其中业务层可以直接访问 NoSQL ,加快查询速度,大大的提高了服务性能。
1.4-SpringMVC执行的流程

-
向服务器发送HTTP请求,请求被前端控制器 DispatcherServlet 捕获。
-
DispatcherServlet 根据<servlet-name>中的配置对请求的URL进行解析,得到请求资源标识符(URI)。然后根据该URI,调用 HandlerMapping 获得该Handler配置的所有相关的对象(包括Handler对象以及Handler对象对应的拦截器),最后以 HandlerExecutionChain 对象的形式返回。
-
DispatcherServlet 根据获得的Handler,选择一个合适的 HandlerAdapter。
-
提取Request中的模型数据,填充Handler入参,开始执行Handler(Controller)。在填充Handler的入参过程中,根据你的配置,Spring将帮你做一些额外的工作:
-
HttpMessageConveter:将请求消息(如Json、xml等数据)转换成一个对象,将对象转换为指定的响应信息。
-
数据转换:对请求消息进行数据转换。如String转换成Integer、Double等。
-
数据格式化:对请求消息进行数据格式化。如将字符串转换成格式化数字或格式化日期等。
-
数据验证:验证数据的有效性(长度、格式等),验证结果存储到BindingResult或Error中。
-
-
Handler(Controller)执行完成后,向 DispatcherServlet 返回一个 ModelAndView 对象。
-
根据返回的ModelAndView,选择一个适合的 ViewResolver(必须是已经注册到Spring容器中的ViewResolver)返回给DispatcherServlet。
-
ViewResolver 结合Model和View,来渲染视图。
-
视图负责将渲染结果返回给客户端
1.5-demo程序
1.5.1-新建、配置
首先新建项目

修改pom.xml文件,添加springmvc和servlet依赖
    <!-- springmvc依赖-->
<!--    版本太高会出现错误,包括但不限于无法启动、页面无法访问-->
<!-- 此外,jdk版本太高会导致500错误,原因可能是spring兼容问题,亲测1.8有用 -->
<dependency>
      <groupId>org.springframework</groupId>
      <artifactId>spring-webmvc</artifactId>
      <version>5.2.5.RELEASE</version>
    </dependency>
<!--    添加servlet依赖-->
    <dependency>
      <groupId>javax.servlet</groupId>
      <artifactId>servlet-api</artifactId>
      <version>2.3</version>
</dependency>配置springmvc.xml文件
<?xml version="1.0" encoding="UTF-8"?>
<beans xmlns="http://www.springframework.org/schema/beans"
       xmlns:xsi="http://www.w3.org/2001/XMLSchema-instance"
       xmlns:context="http://www.springframework.org/schema/context"
       xsi:schemaLocation="http://www.springframework.org/schema/beans http://www.springframework.org/schema/beans/spring-beans.xsd http://www.springframework.org/schema/context https://www.springframework.org/schema/context/spring-context.xsd">

<!--    添加包扫描-->
    <context:component-scan base-package="org.example.ctrl"/>
<!--    添加视图解析器-->
    <bean class="org.springframework.web.servlet.view.InternalResourceViewResolver">
<!--        配置前缀-->
        <property name="prefix" value="/admin"/>
<!--        配置后缀-->
        <property name="suffix" value=".jsp"/>
    </bean>
</beans>
1.5.2-webapp文件编写
对应视图解析器,新建admin文件夹,新建文件main.jsp
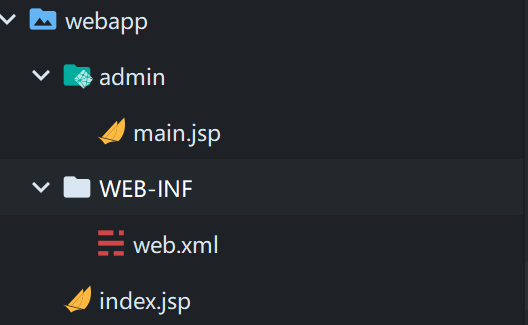
在main.jsp文件中随便写点什么,便于区分就行
<%--
  Created by IntelliJ IDEA.
  User: 23859
  Date: 2022-08-06
  Time: 13:35
  To change this template use File | Settings | File Templates.
--%>
<%@ page contentType="text/html;charset=UTF-8" language="java" %>
<html>
<head>
    <title>Title</title>
</head>
<body>
<h2>main...........</h2>
</body>
</html>配置WEB-INF下的web.xml文件
<?xml version="1.0" encoding="UTF-8"?>
<!-- 配置版本为4.0,低版本不支持 -->
<web-app xmlns="http://xmlns.jcp.org/xml/ns/javaee"
         xmlns:xsi="http://www.w3.org/2001/XMLSchema-instance"
         xsi:schemaLocation="http://xmlns.jcp.org/xml/ns/javaee http://xmlns.jcp.org/xml/ns/javaee/web-app_4_0.xsd"
         version="4.0">
    <!--注册SpringMVC框架-->
    <servlet>
        <servlet-name>springmvc</servlet-name>
        <servlet-class>org.springframework.web.servlet.DispatcherServlet</servlet-class>
        <init-param>
            <param-name>contextConfigLocation</param-name>
            <param-value>classpath:springmvc.xml</param-value>
        </init-param>
    </servlet>
    <servlet-mapping>
        <servlet-name>springmvc</servlet-name>
        <!--
          指定拦截什么样的请求
          http://localhost:8080/one
          http://localhost:8080/index.jsp
          http://localhost:8080/demo.action
          <a href="${pageContext.request.contextPath}/demo.action">访问服务器</a>
        -->
        <!--
          所有以.action结尾的请求都会经由 springmvc 的 DispatcherServlet 处理
         -->
        <url-pattern>*.action</url-pattern>
    </servlet-mapping>
</web-app>在index.jsp下创建请求
<!-- 此请求表示访问 /zar/ 这个虚拟目录下的 demo的action,action结尾会被springmvc处理,我们可以编写类来定义处理逻辑 -->
<a href="${pageContext.request.contextPath}/zar/demo.action">访问服务器zar</a>
1.5.3-java类编写
// 此包名对应 springmvc.xml 中对应的包扫描
package org.example.ctrl;

import org.springframework.stereotype.Controller;
import org.springframework.web.bind.annotation.RequestMapping;

/**
 * @program: springmvc
 * @description: 一个类用于处理"/zar"虚拟目录下的请求
 * @author: 超级虚空
 * @create: 2022-08-06 13:47
 **/
@Controller // 交给spring创建对象
@RequestMapping("/zar") //虚拟请求路径 /zar 下的请求会在此处理
public class DemoAction {

    /**
     * /zar/demo.action 会在此处理
     */
    @RequestMapping("/demo")
    public String demo(){
        System.out.println("zar服务器被访问到了.......");
        return "main";  //可以直接跳到/admin/main.jsp页面上
    }

}
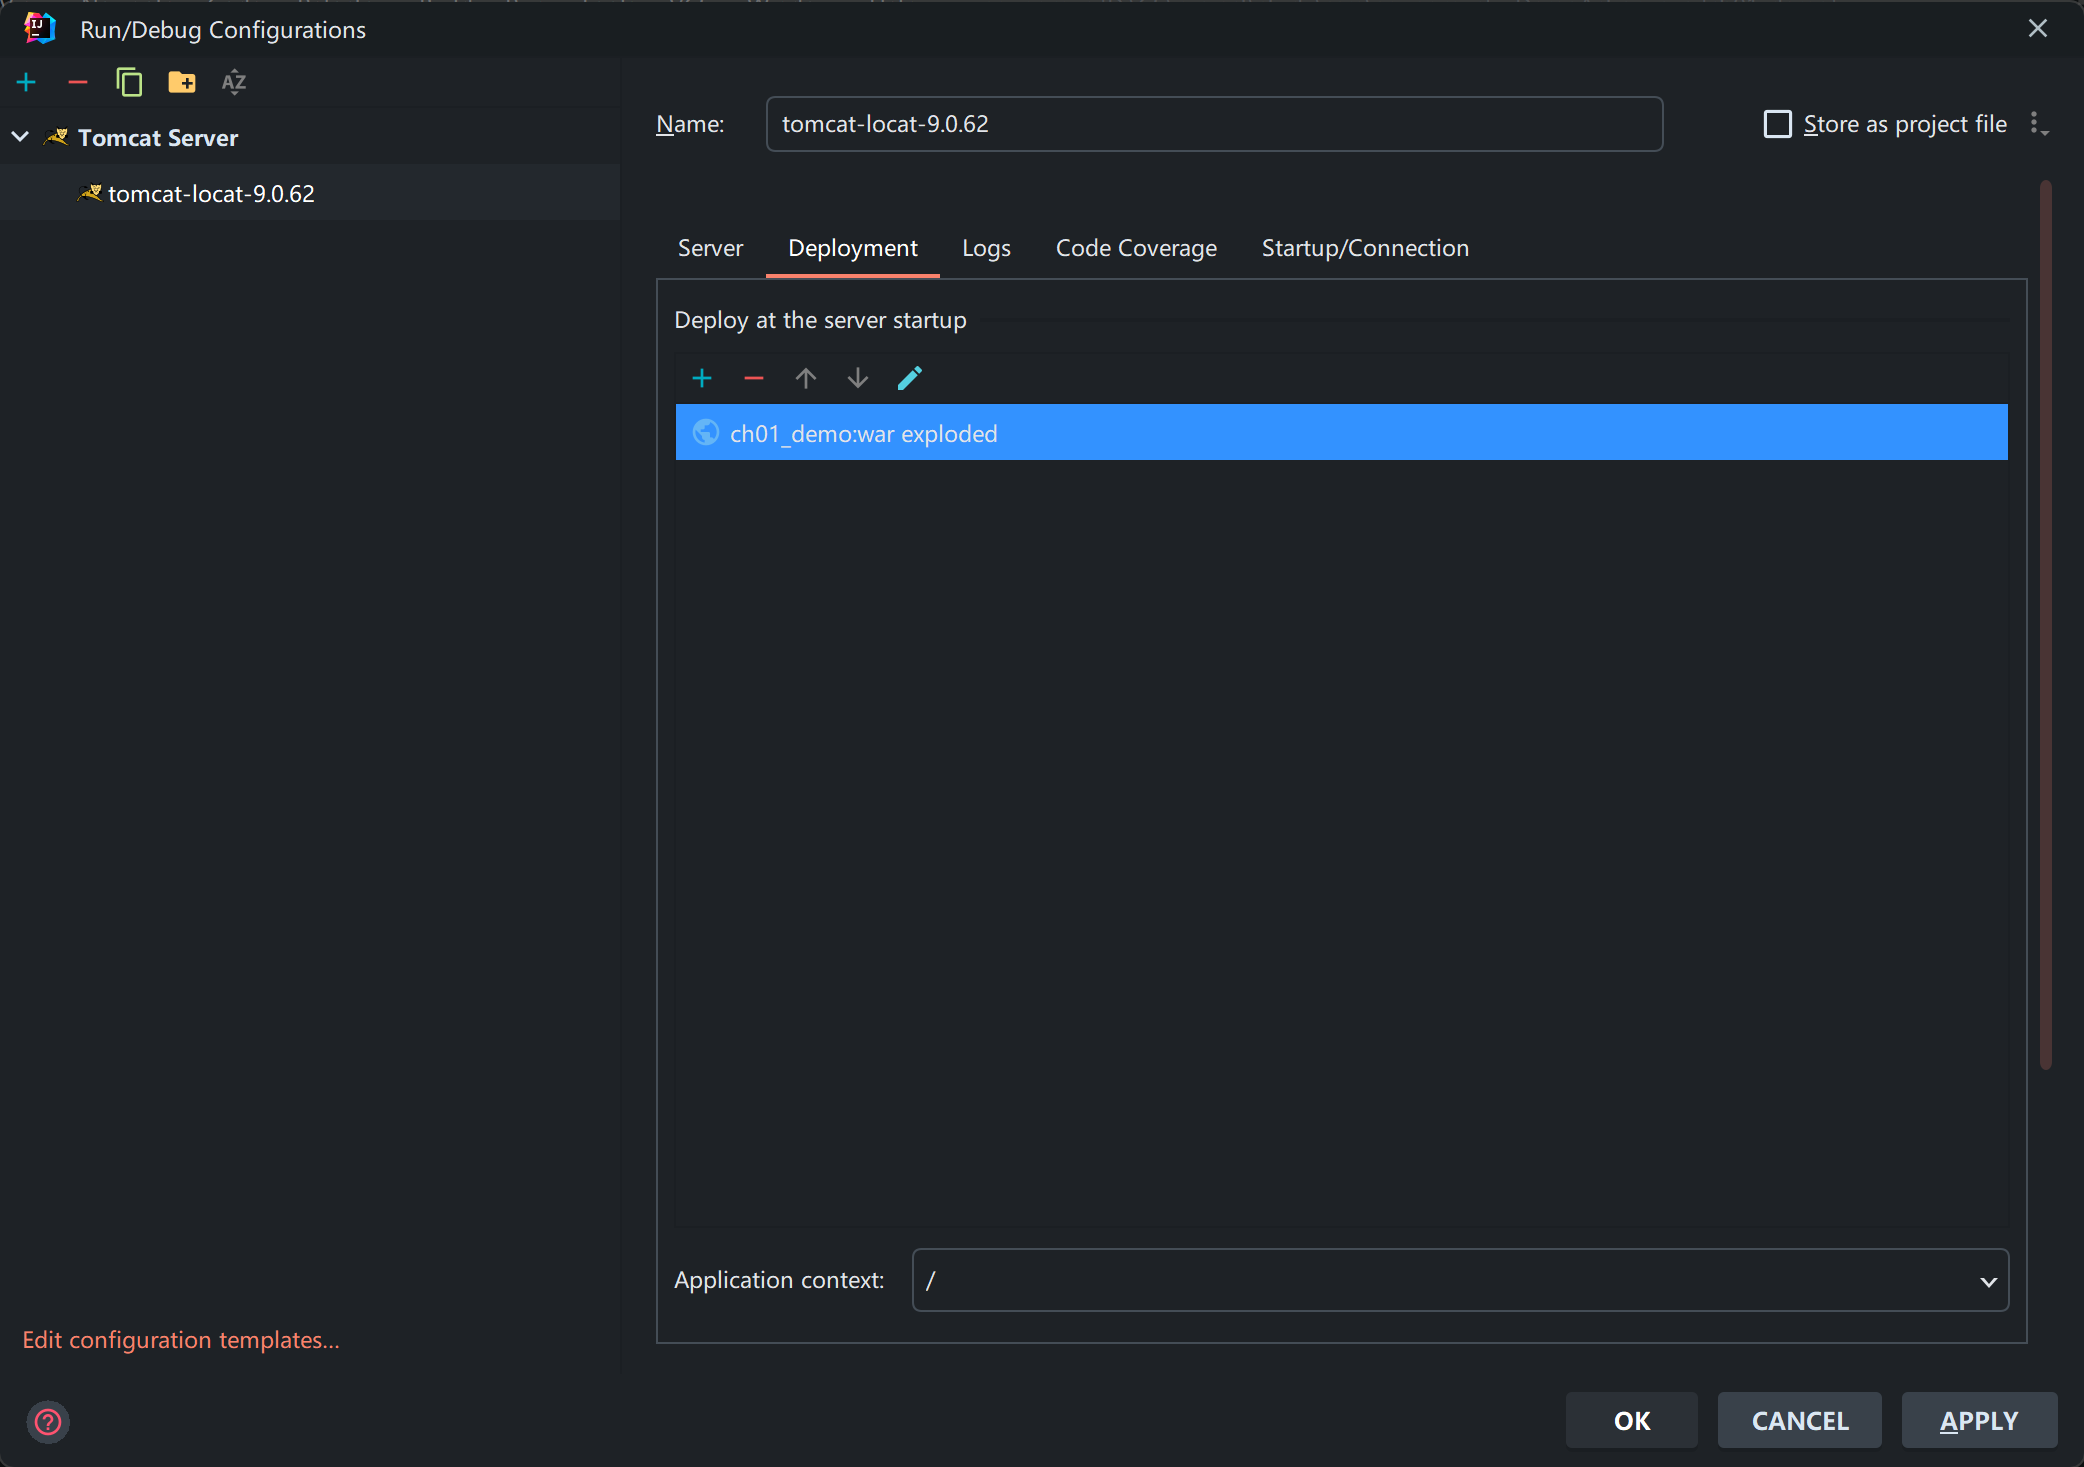
1.5.4-测试
添加tomcat配置
2-注解式开发
2.1-@RequestMapping定义请求规则
此注解就是来映射服务器访问的路径.
- 此注解可加在方法上,是为此方法注册一个可以访问的名称(路径)
@RequestMapping("/demo")
public String demo(){
    System.out.println("服务器被访问到了.......");
    return "main";  //可以直接跳到/admin/main.jsp页面上
}
// <a href="${pageContext.request.contextPath}/demo.action">访问服务器</a>- 此注解可以加在类上,相当于是包名(虚拟路径),区分不同类中相同的action的名称
@RequestMapping("/user")
public class DemoAction1 {..}
// <a href="${pageContext.request.contextPath}/user/demo.action">访问服务器</a>- 此注解可区分get请求和post请求
package org.example.ctrl;

import org.springframework.stereotype.Controller;
import org.springframework.web.bind.annotation.RequestMapping;
import org.springframework.web.bind.annotation.RequestMethod;

/**
* @program: ch02_datasubmit
* @description: 处理post和get请求的方法
* @author: 超级虚空
* @create: 2022-08-06 18:10
**/

@Controller
public class PostGet {
  @RequestMapping(value = "/postget", method = RequestMethod.POST)
  public String post(){
      System.out.println("post方法");
      return "main";
  }

  @RequestMapping(value = "/postget", method = RequestMethod.GET)
  public String get(){
      System.out.println("get方法");
      return "main";
  }
}
2.2-五种数据提交的方式
2.2.1-单数据注入
@Controller
public class Action1 {
    @RequestMapping("/one")
    public String one(String myname,int age){
        // ===>自动注入,并且类型转换
        System.out.println("1==>myname="+myname+",age="+(age+100));
        return "main";
    }
}
<div>
    <h2>1. 单数据提交</h2>
    <form action="${pageContext.request.contextPath}/one.action">
        姓名:<input name="myname" value="myname"><br>
        年龄:<input name="age" value="18"><br>
        <input type="submit" value="提交">
    </form>
</div>
2.2.2-对象封装注入
public class Users {
    private String name;
    private int age;
}@Controller
public class Action2 {
@RequestMapping("/two")
public String two(Users u){
System.out.println("2==>"+u);
return "main";
}
}
<div>
    <h2>2. 对象封装数据提交</h2>
    <form action="${pageContext.request.contextPath}/two.action" method="post">
        姓名:<input name="name" value="张三"><br>
        年龄:<input name="age" value="18"><br>
        <input type="submit" value="提交">
    </form>
</div>
2.2.3-动态占位符
@Controller
public class Action3 {
    /**
     * PathVariable 用来解析路径中的请求参数
     * @param name 用户名
     * @param age 年龄
     * @return 返回值固定为main
     */
    @RequestMapping("/three/{uname}/{uage}")
    public String three(
            @PathVariable("uname")
            String name,
            @PathVariable("uage")
            int age){
        System.out.println("3==>name="+name+",age="+(age+100));
        return "main";
    }
} <h2>3. 动态占位符</h2>
<a href="${pageContext.request.contextPath}/three/张三/22.action">动态提交</a>2.2.4-请求参数名称与参数名称不一致
@Controller
public class Action4 {
    @RequestMapping("/four")
    public String four(
            @RequestParam("name")  // ===>专门用来解决名称不一致的问题
            String uname,
            @RequestParam("age")
            int uage){
        System.out.println("4==>uname="+uname+",uage="+(uage+100));
        return "main";
    }
}<div>
<h2>4. 请求参数名称与参数名称不一致</h2>
<form action="${pageContext.request.contextPath}/four.action" method="post">
姓名:<input name="name" value="张三"><br>
年龄:<input name="age" value="18"><br>
<input type="submit" value="提交">
</form>
</div>2.2.5-对象提取
@Controller
public class Action5 {
    @RequestMapping("/five")
    public String five(HttpServletRequest request){
        String name = request.getParameter("name");
        int age = Integer.parseInt(request.getParameter("age"));
        System.out.println("5==>name="+name+",age="+(age+100));
        return "main";
    }
}<div>
<h2>5. 对象提取</h2>
<form action="${pageContext.request.contextPath}/five.action" method="post">
姓名:<input name="name" value="张三"><br>
年龄:<input name="age" value="18"><br>
<input type="submit" value="提交">
</form>
</div>2.3-请求参数中文乱码解决
在web.xml中插入一下代码
  <!-- 中文编码过滤器配置-->
  <filter>
    <filter-name>encode</filter-name>
    <filter-class>org.springframework.web.filter.CharacterEncodingFilter</filter-class>
    <!--
      配置参数
        private String encoding;
        private boolean forceRequestEncoding;
        private boolean forceResponseEncoding;
    -->
    <init-param>
      <param-name>encoding</param-name>
      <param-value>UTF-8</param-value>
    </init-param>
    <init-param>
<!--      请求编码会强制转换-->
      <param-name>forceRequestEncoding</param-name>
      <param-value>true</param-value>
    </init-param>
    <init-param>
<!--      响应编码会强制转换-->
      <param-name>forceResponseEncoding</param-name>
      <param-value>true</param-value>
    </init-param>
  </filter>
  <filter-mapping>
<!--    表示所有请求都会转换为u8编码-->
    <filter-name>encode</filter-name>
    <url-pattern>/*</url-pattern>
  </filter-mapping>
2.4-处理器方法的返回值
| 返回类型 | 描述 |
|---|---|
| String | 客户端资源的地址,自动拼接前缀和后缀.还可以屏蔽自动拼接字符串,可以指定返回的路径. |
| Object | 返回json格式的对象.自动将对象或集合转为json.使用的jackson工具进行转换,必须要添加jackson依赖.一般用于ajax请求 |
| void | 无返回值,一般用于ajax请求 |
| 基本数据类型 | 用于ajax请求 |
| ModelAndView | 返回数据和视图对象,现在用的很少。(既要传递资源,又要跳转) |
2.5-ajax
-
配置mvc
<?xml version="1.0" encoding="UTF-8"?> <beans xmlns="http://www.springframework.org/schema/beans" xmlns:xsi="http://www.w3.org/2001/XMLSchema-instance" xmlns:context="http://www.springframework.org/schema/context" xmlns:mvc="http://www.springframework.org/schema/mvc" xsi:schemaLocation="http://www.springframework.org/schema/beans http://www.springframework.org/schema/beans/spring-beans.xsd http://www.springframework.org/schema/context https://www.springframework.org/schema/context/spring-context.xsd http://www.springframework.org/schema/mvc https://www.springframework.org/schema/mvc/spring-mvc.xsd"> <context:component-scan base-package="org.example.ctrl"/> <!-- 添加注解驱动--> <mvc:annotation-driven/> <!-- 不用添加视图解析器, 因为处理的是ajax请求--> <!-- <bean class="org.springframework.web.servlet.view.InternalResourceViewResolver">--> <!-- <property name="prefix" value="/admin/"/>--> <!-- <property name="suffix" value=".jsp"/>--> <!-- </bean>--> </beans> -
写网页
<%@ page contentType="text/html;charset=UTF-8" language="java" %> <html> <head> <title>Title</title> <script src="js/jquery-3.3.1.js"></script> </head> <body> <a href="javascript:showStu()">访问服务器返回学生集合</a> <div id="stuList">等待服务器返回数据</div> <script type="text/javascript"> function showStu(){ // 使用jQuery封装的方法发送请求 $.ajax({ // 获取项目根路径 url : "${pageContext.request.contextPath}/stuList.action", type:"get", dataType:"json", success:function (stuList){ var s=""; // 在对应java对象中,参数也是name和age $.each(stuList, function (i, stu){s+=stu.name+"\t"+stu.age+"<br>"}); $("#stuList").html(s); } }); } </script> </body> </html> -
写java代码,需创建Student对象
package org.example.ctrl;

import org.example.pojo.Student;
import org.springframework.stereotype.Controller;
import org.springframework.web.bind.annotation.RequestMapping;
import org.springframework.web.bind.annotation.ResponseBody;

import java.util.ArrayList;
import java.util.List;

/**
 * @program: ch03_ajax
 * @description:
 * @author: 超级虚空
 * @create: 2022-08-07 08:48
 **/
@Controller
public class StuListAjaxAction {
    @RequestMapping("/stuList")
    @ResponseBody // 用来解析ajax请求, 需要在springmvc配置文件中添加注解驱动
    public List<Student> getStudentList(){
        List<Student> list = new ArrayList<>();
        list.add(new Student("a阿斯顿",1));
        list.add(new Student("b大苏打",2));
        list.add(new Student("c阿迪斯",3));
        // springmvc框架自动将集合转化为json数组
        return list;
    }
}
2.6-SpringMVC的四种跳转方式
forward::只要使用了forward:就可以屏蔽前缀和后缀的拼接,自己手工构建返回的全部路径
如:
@RequestMapping("/one")
public String one(){
    System.out.println("请求转发页面(默认)");
    //以前的访问方式
    //request.getRequestDispatcher("/admin/main.jsp").forward(request,response);
    //观察地址栏的变化:  http://localhost:8080/one.action
    //return "main"; //默认的访问方式是自动拼接前缀和后缀进行跳转
    return "forward:/fore/user.jsp";//只要使用了forward:就可以屏蔽前缀和后缀的拼接,自己手工构建返回的全部路径+.jsp
}
@RequestMapping("/two")
public String two(){
    System.out.println("请求转发action");
    //观察地址栏的变化:  http://localhost:8080/two.action
    return "forward:/other.action";   //不使用forward:,就会是这样的路径  /admin/other.action/.jsp
}redirect::只要使用了redirect:就可以屏蔽前缀和后缀的拼接
@RequestMapping("/three")
public String three(){
    System.out.println("重定向页面");
    //观察地址栏的变化  http://localhost:8080/admin/main.jsp
    return "redirect:/admin/main.jsp";//只要使用了redirect:就可以屏蔽前缀和后缀的拼接
}
@RequestMapping("/four")
public String four(){
    System.out.println("重定向action");
    //观察地址栏的变化  http://localhost:8080/other.action
    return "redirect:/other.action";//只要使用了redirect:就可以屏蔽前缀和后缀的拼接
}
2.7-SpringMVC支持的默认参数类型
2.8-日期处理
2.9-mvc:annotation-driven标签的使用
2.10-资源在WEB-INF目录下
3-拦截器
4-SSM整合项目
参考
[1] - Spring MVC【入门】就这一篇, 我没有三颗心脏, https://www.jianshu.com/p/91a2d0a1e45a
[2] - SpringMVC执行流程及工作原理, CoderZS, https://www.jianshu.com/p/8a20c547e245