前置知识
- Spring
- Spring-Boot
- Java-Web(里面都是Filter)
框架简介
spring-security 的核心是认证和授权,是一个重量级框架
认证
认证:验证用户是否合法,即系统是否允许用户登录
授权
授权:验证用户是否有权限干什么(删库跑路)
自从有了 Spring Boot 之后,Spring Boot 对于 Spring Security 提供了 自动化配置方案,可以零配置使用 Spring Security。
因此,一般来说,常见的安全管理技术栈的组合是这样的:
- SSM + Shiro
- Spring Boot/Spring Cloud + Spring Security
入门案例
创建项目

引入依赖
<dependency>
    <groupId>org.springframework.boot</groupId>
    <artifactId>spring-boot-starter-security</artifactId>
</dependency>
测试
随便编写一个Controller测试
package com.example.springsecurity.demo.controller;
import org.springframework.web.bind.annotation.GetMapping;
import org.springframework.web.bind.annotation.RequestMapping;
import org.springframework.web.bind.annotation.RestController;
@RestController
@RequestMapping("/test")
public class TestController {
@GetMapping("/hello")
public String hello(){
return "Hello";
}
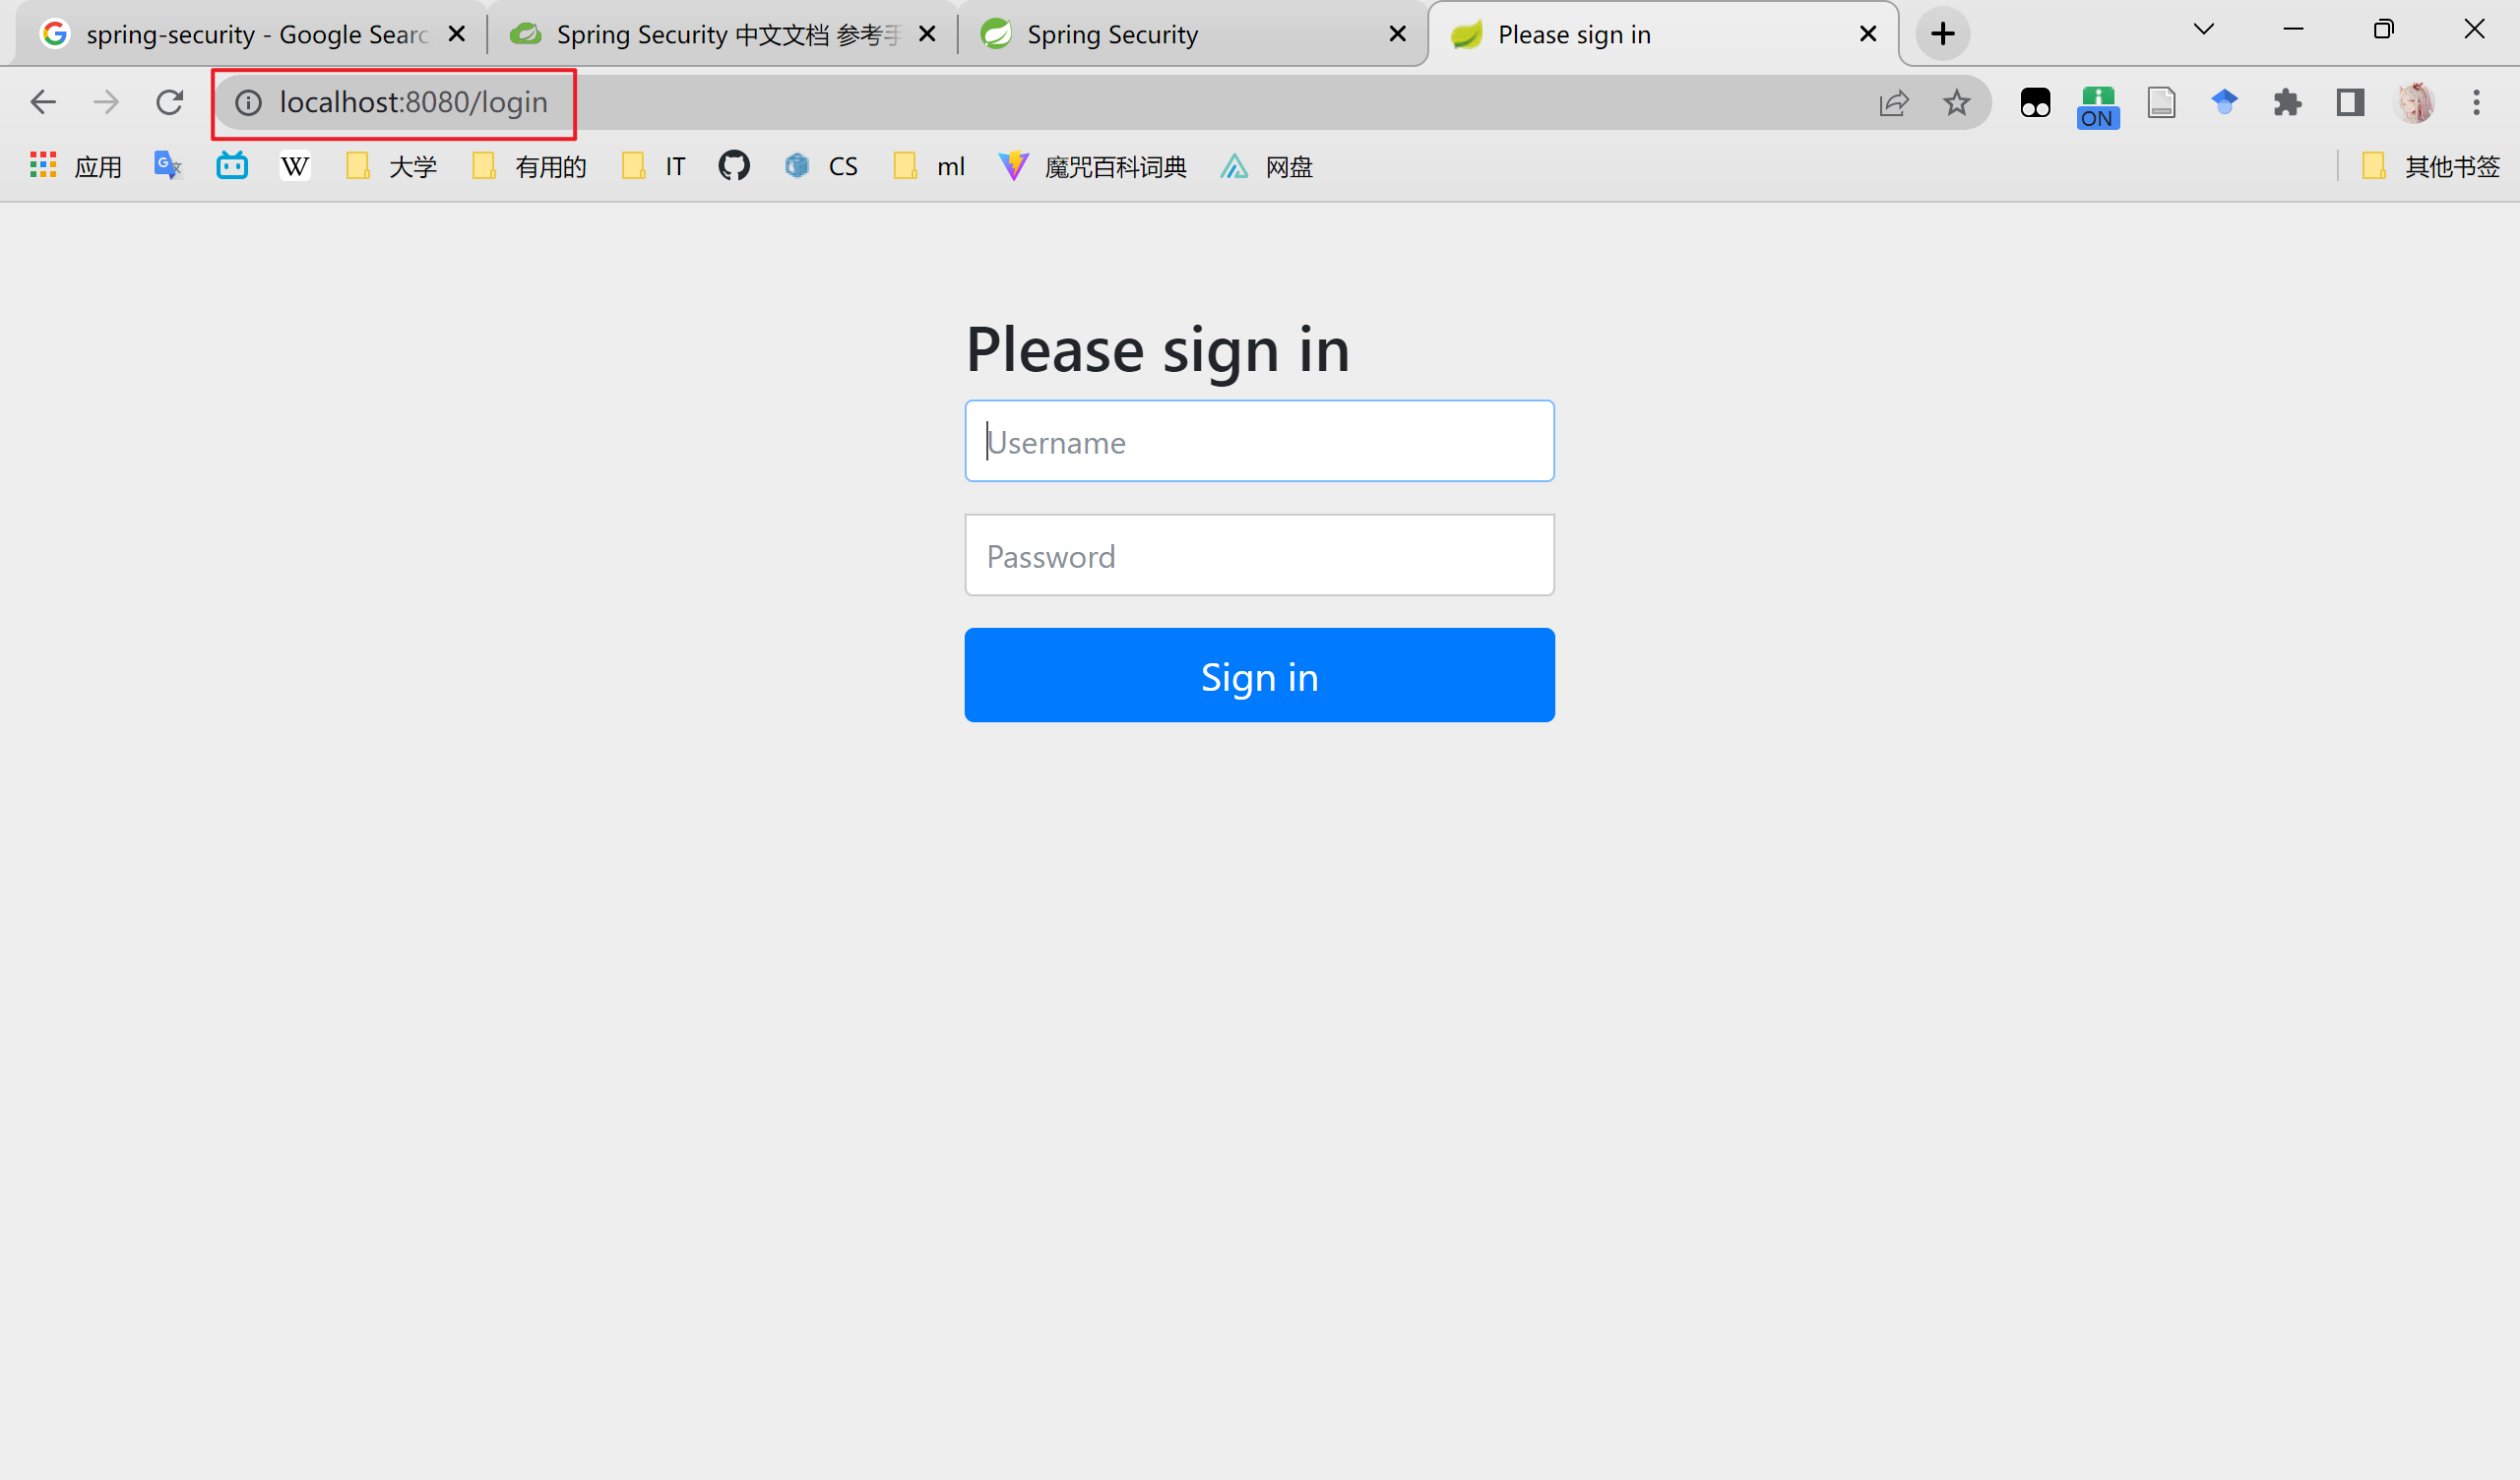
}浏览器访问后会直接跳转到login
如何登录呢?
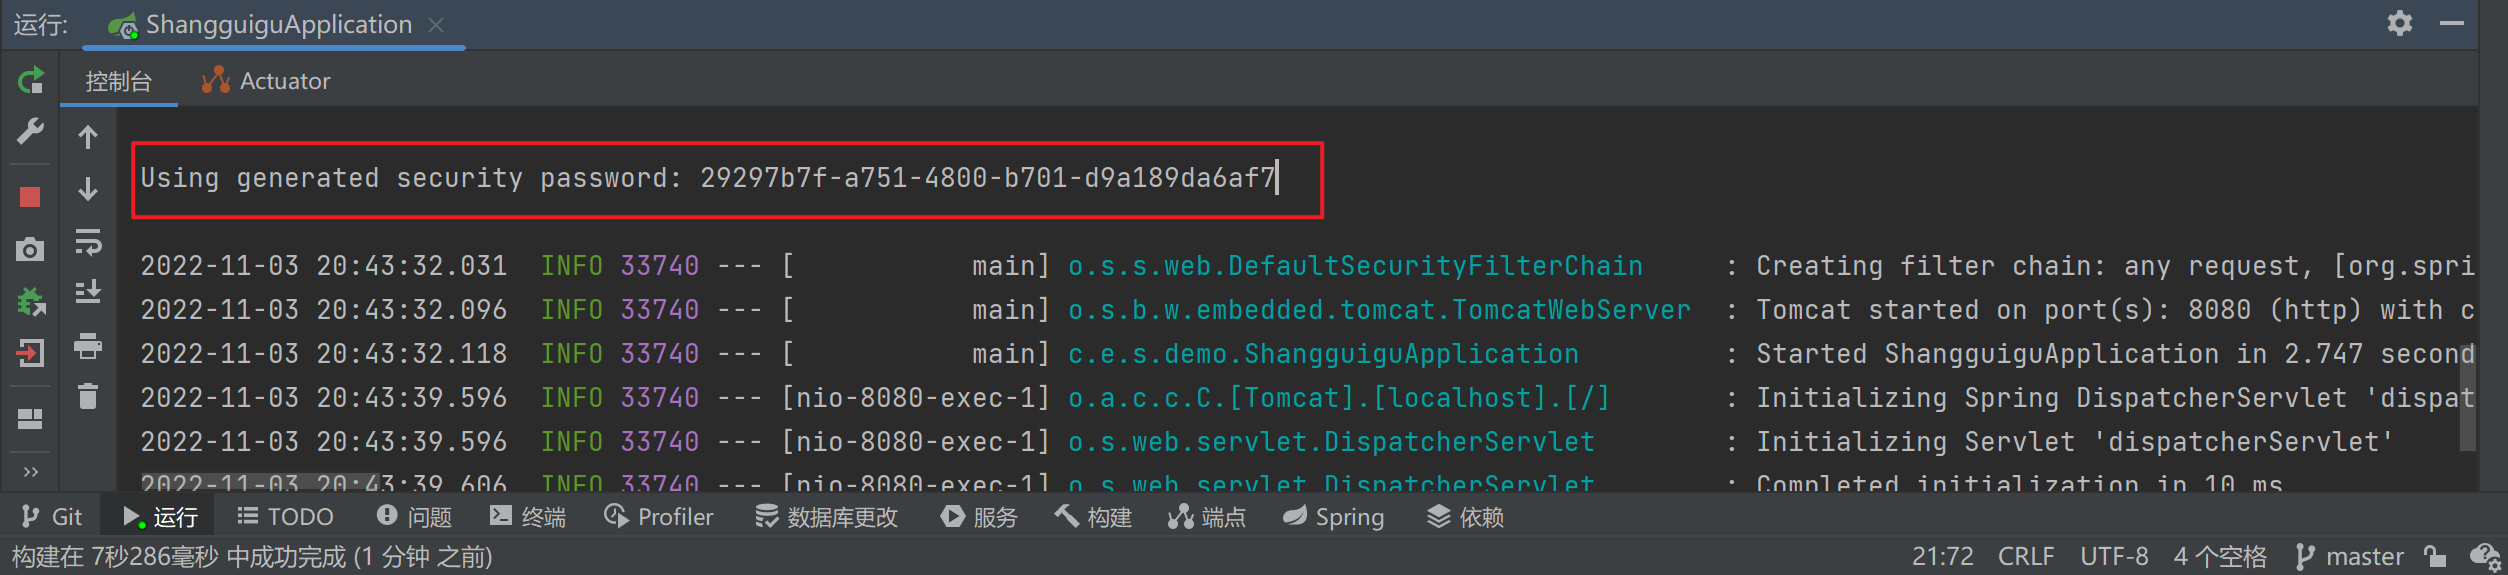
看看控制台,spring-security在启动时会生成默认密码,默认用户名为user
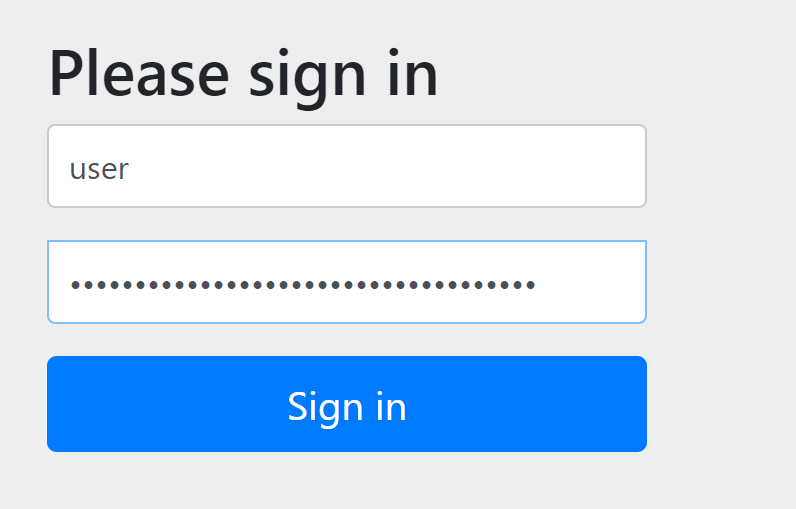
现在就可以跳转到hello页面了

Spring-Security 基本原理
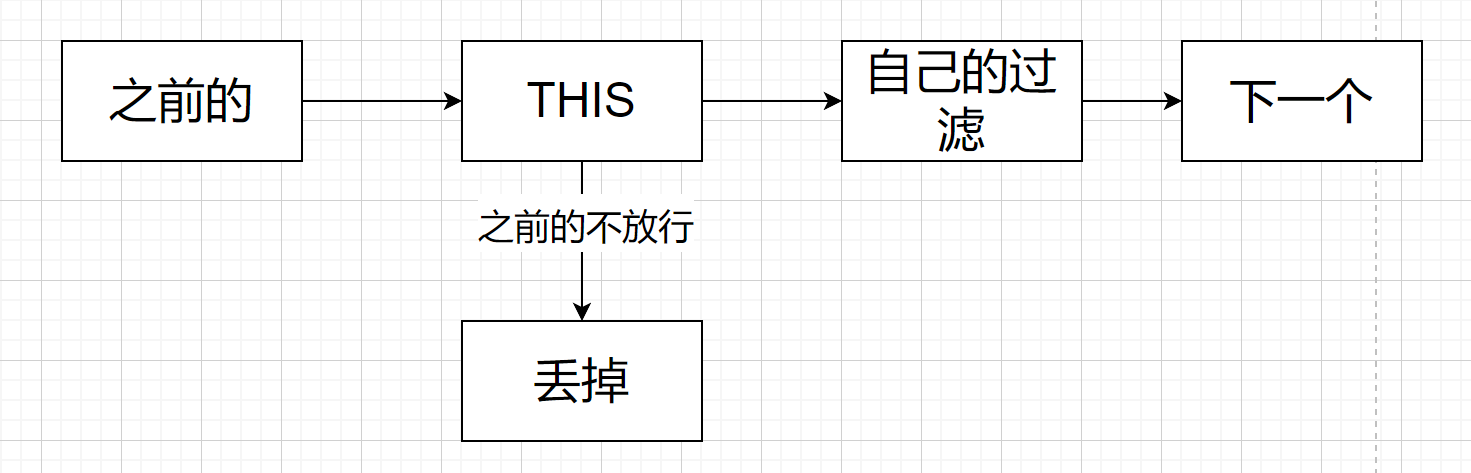
Spring-Security的本质是一个过滤器链:

当你启动Spring-Security后会启动不同的过滤器,你执行不同请求后会调用不同的过滤器链
常见过滤器
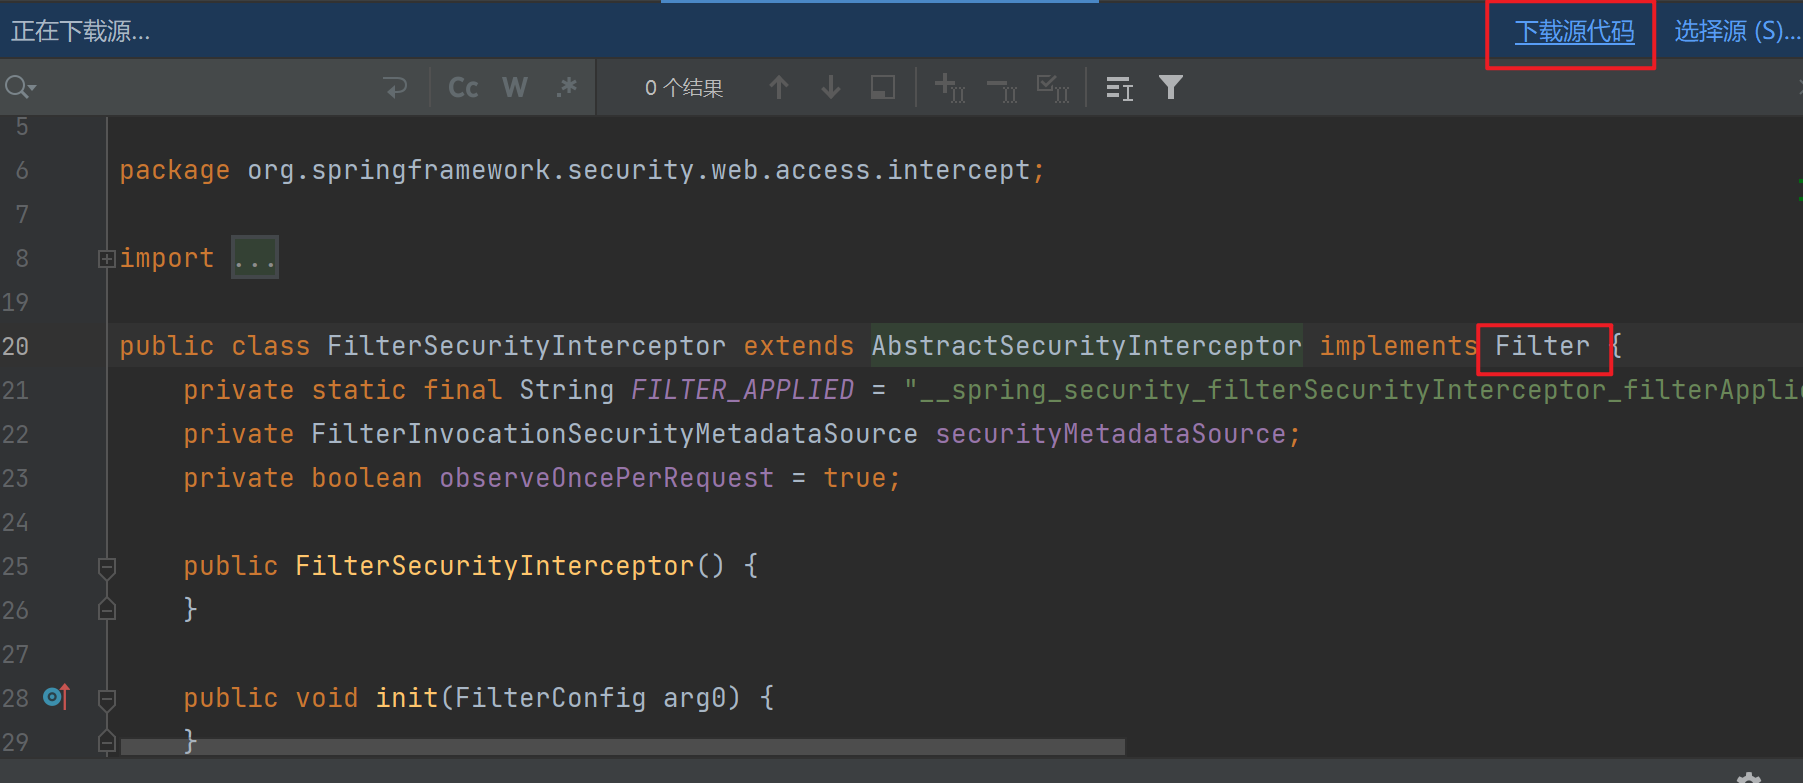
FileterSecurityIntercepter
方法级别过滤器,位于过滤器最底层
具体步骤是
- 先等到之前的过滤器,如果放行,那么执行自己的过滤器
ExceptionTranslationFilter
判断认证授权过程中的异常,不同的异常执行不同的处理
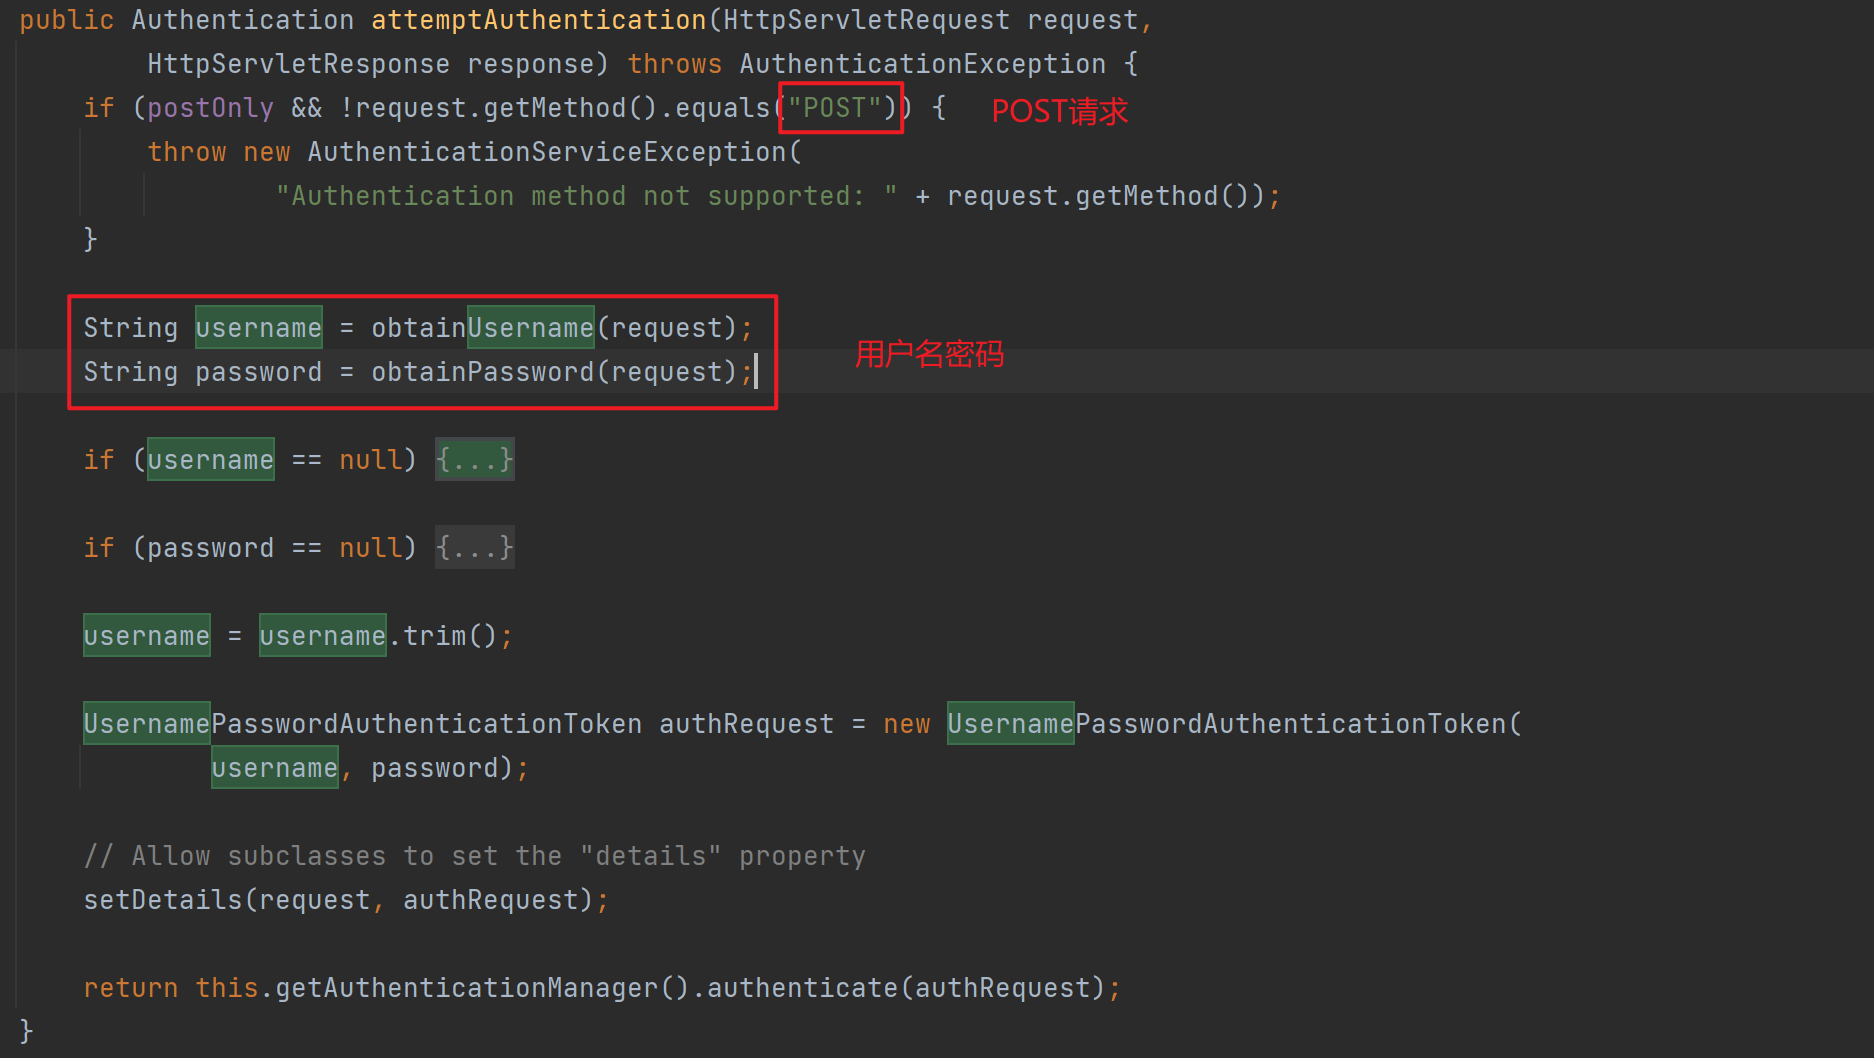
UsernamePasswordAuthenticationFilter
用户名密码过滤器,用于校验”/login” POST请求中用户名密码
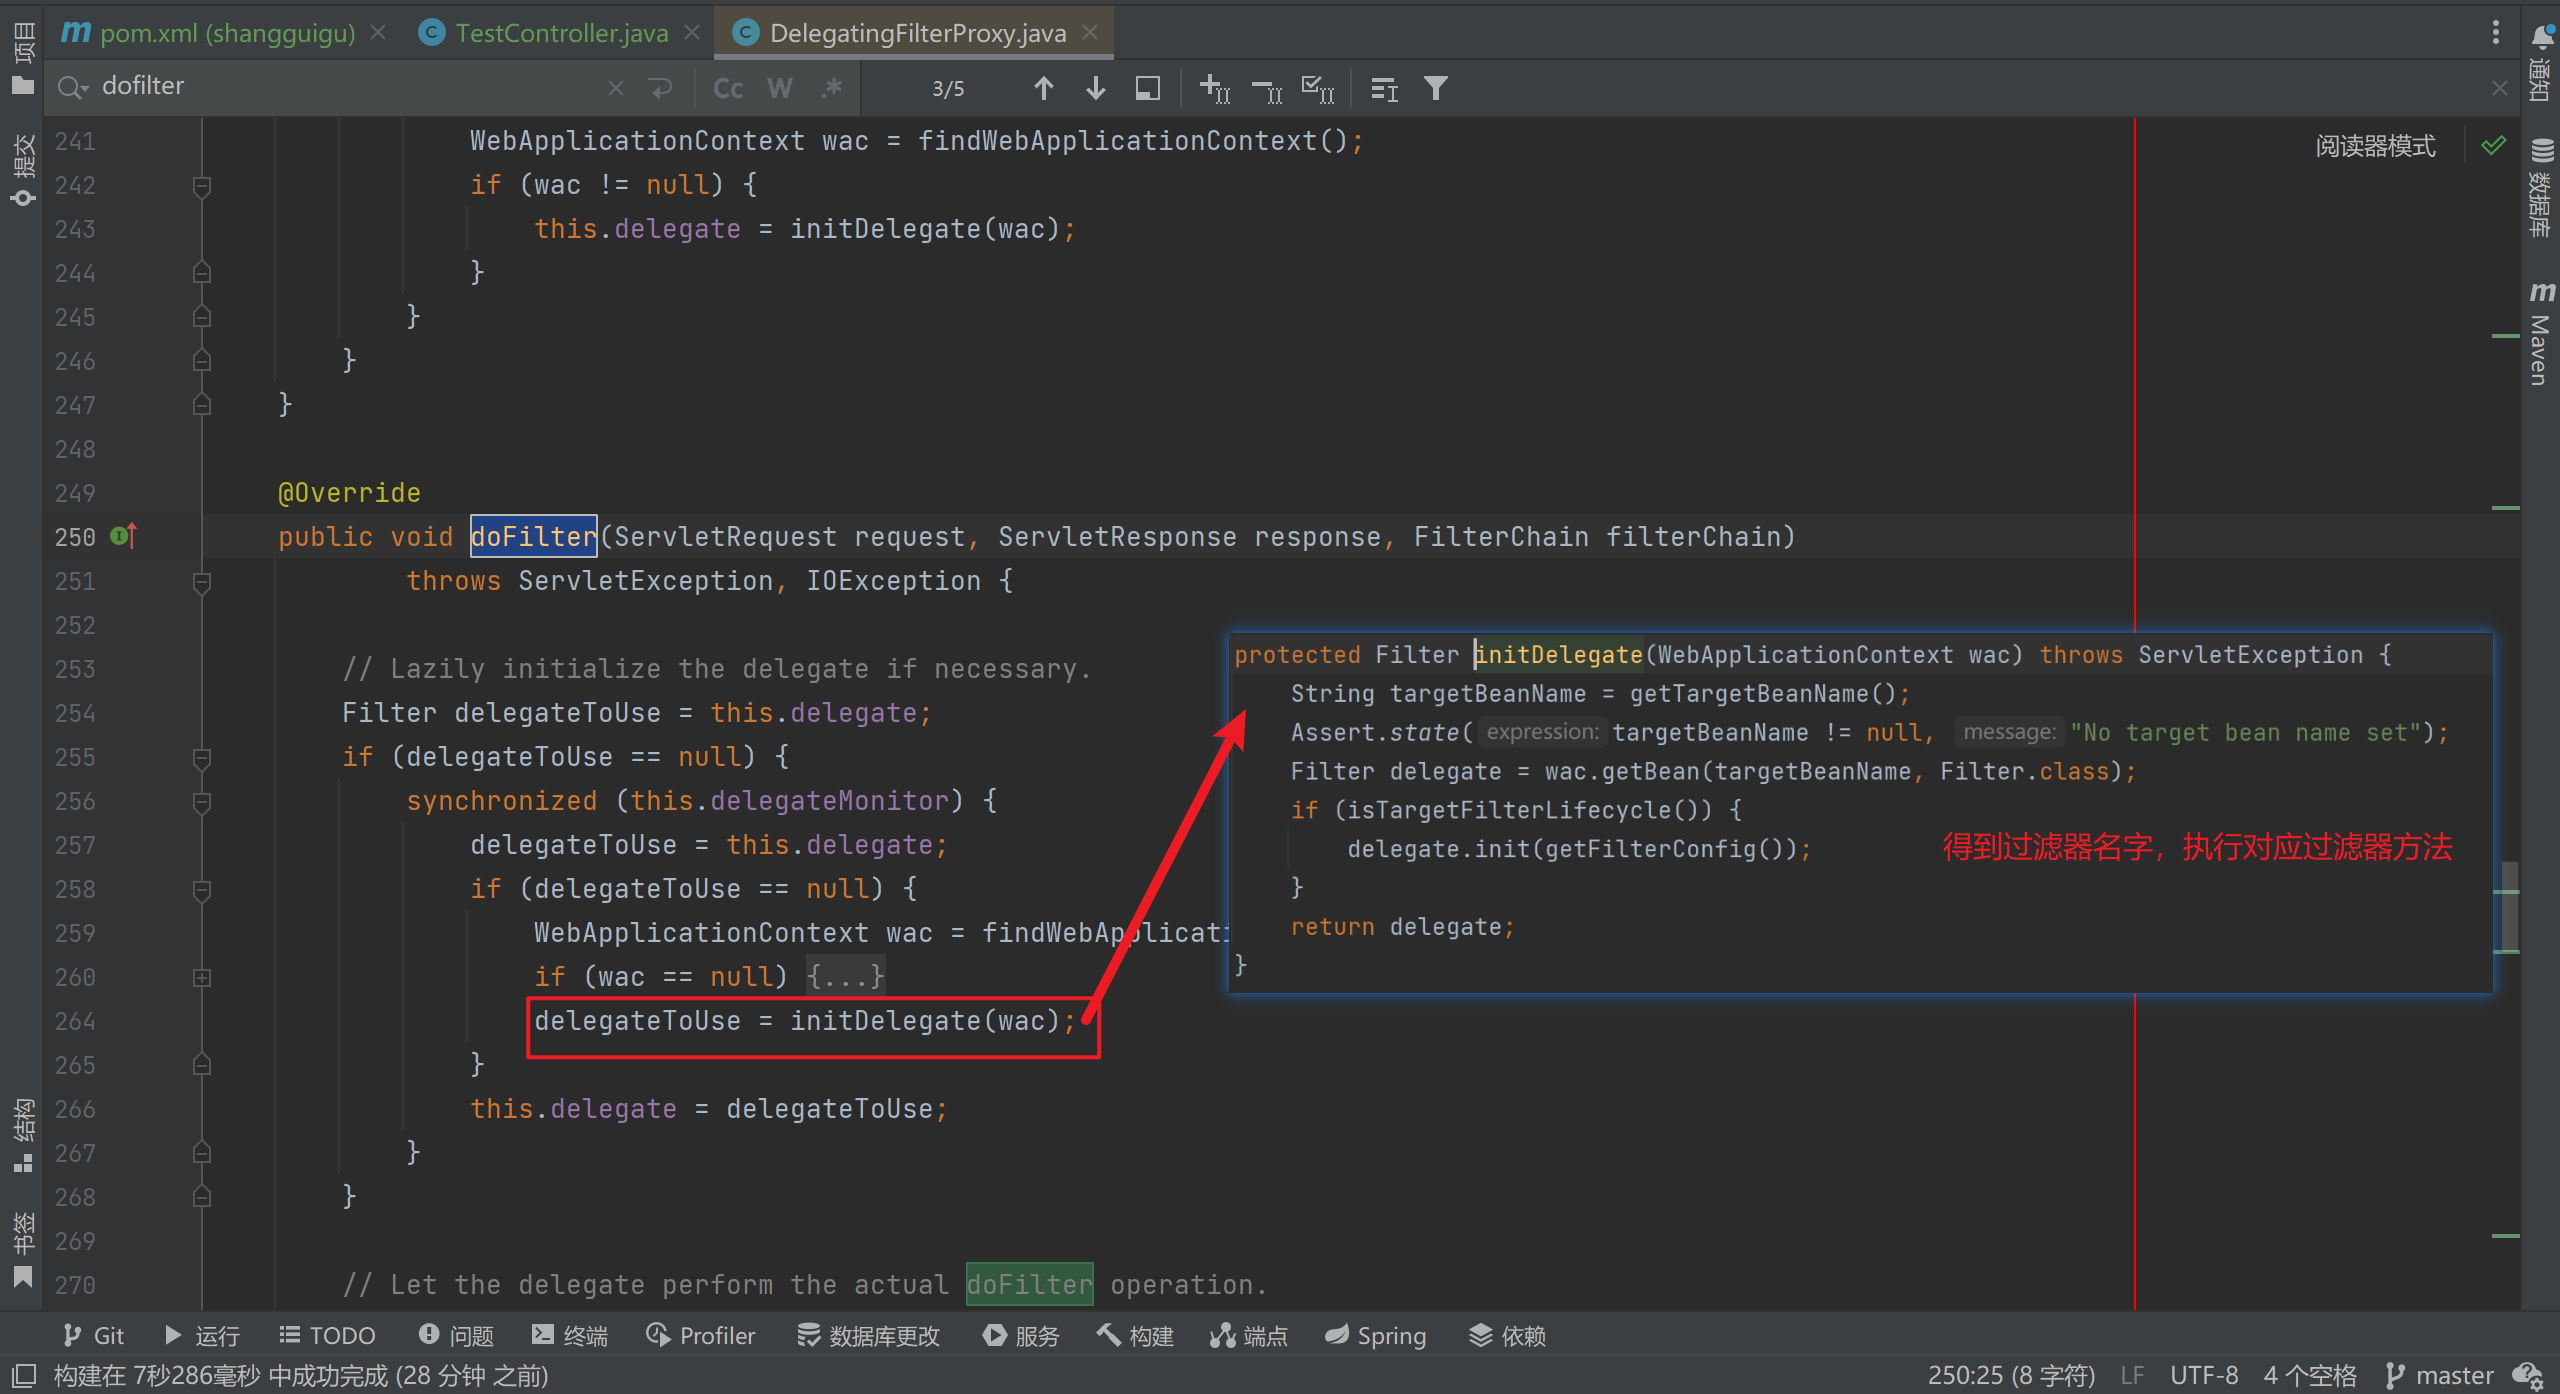
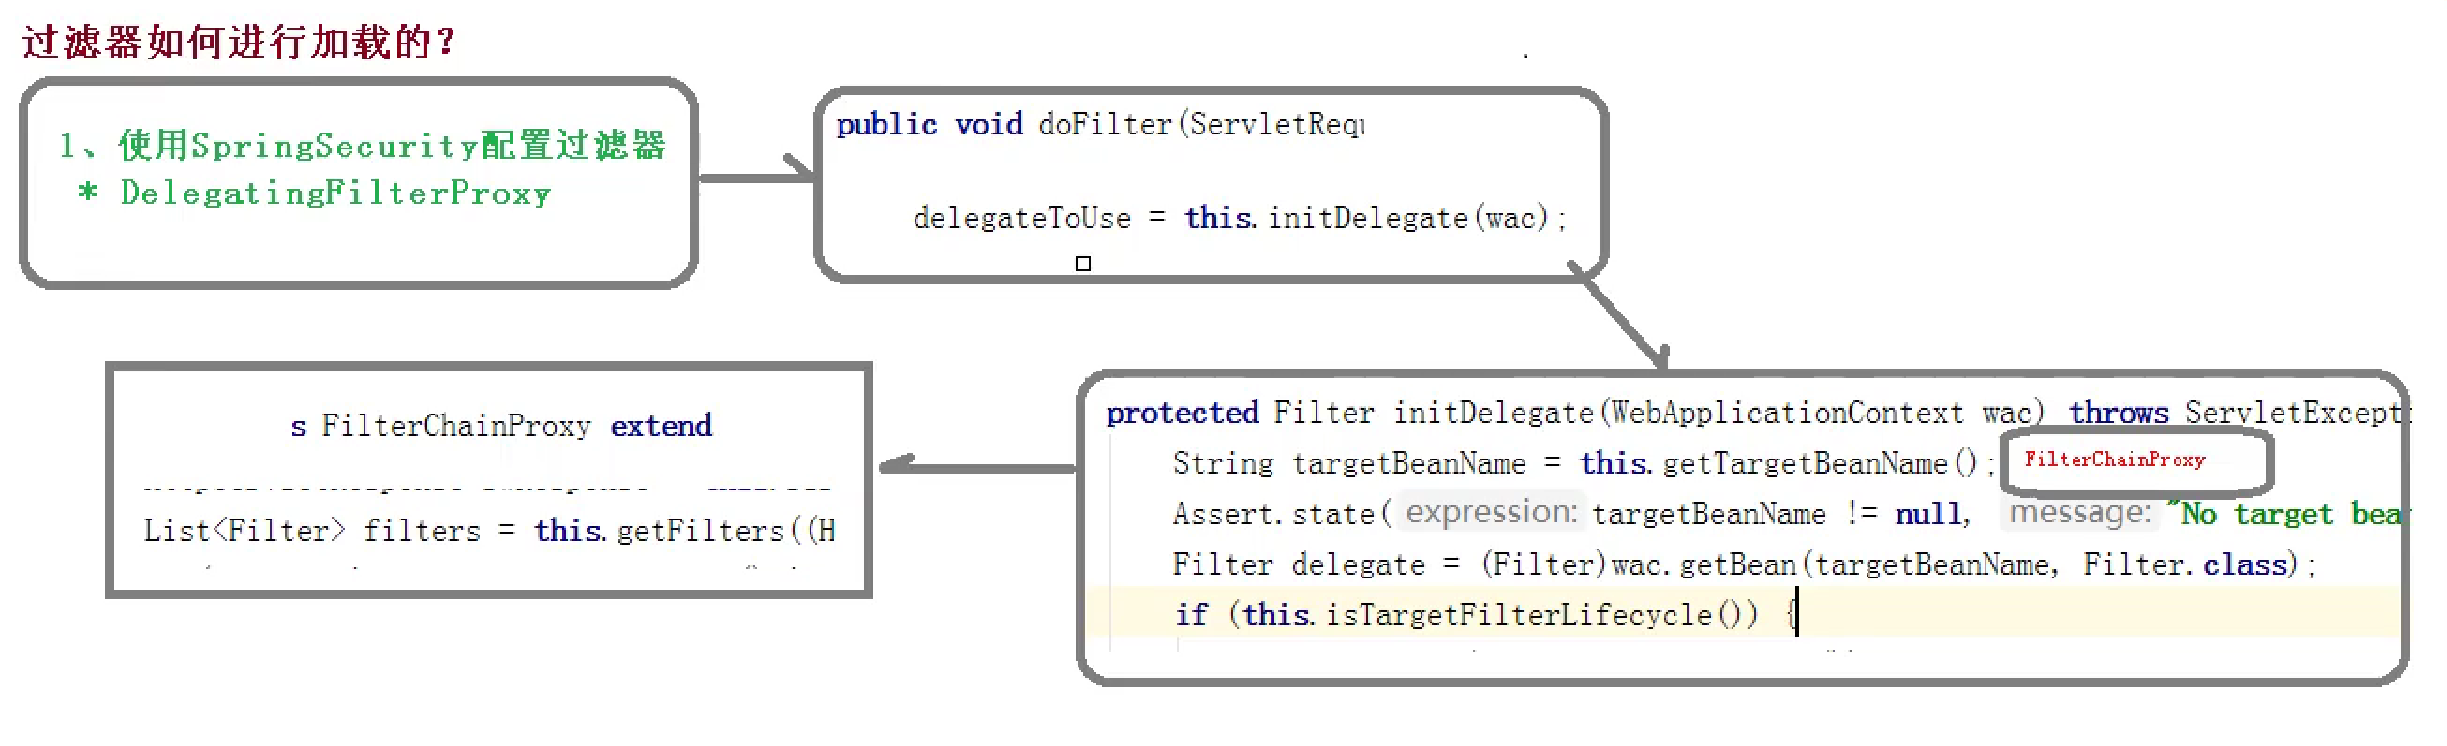
过滤器加载过程
DelegatingFilterProxy
两个重要接口
UserDetailService
用于自定义开发,最开始的项目中需要用户名密码(自动生成),但是实际上我们需要从数据库中拿取。
那么这时需要
-
自定义继承 UsernamePasswordAuthenticationFilter ,重写
-
attemptAuthentication
-
unsuccessfulAuthentication
-
successfulAuthentication
-
-
创建类实现UserDetailService,编写数据查询过程,返回用户数据()
PasswordDecoder
用于加密用户密码
Spring-Security Web权限方案
认证
设置用户名密码
1. 配置文件配置
security:
  user:
    name: user
    password: 123456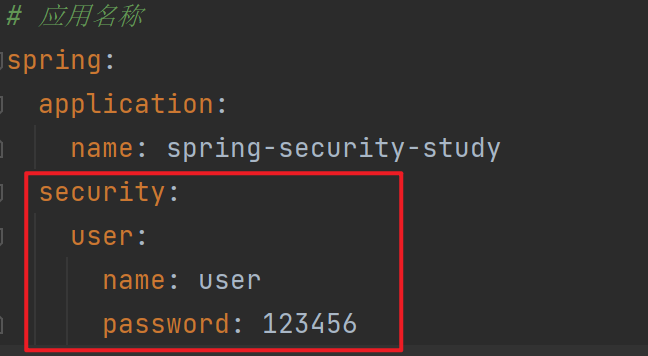
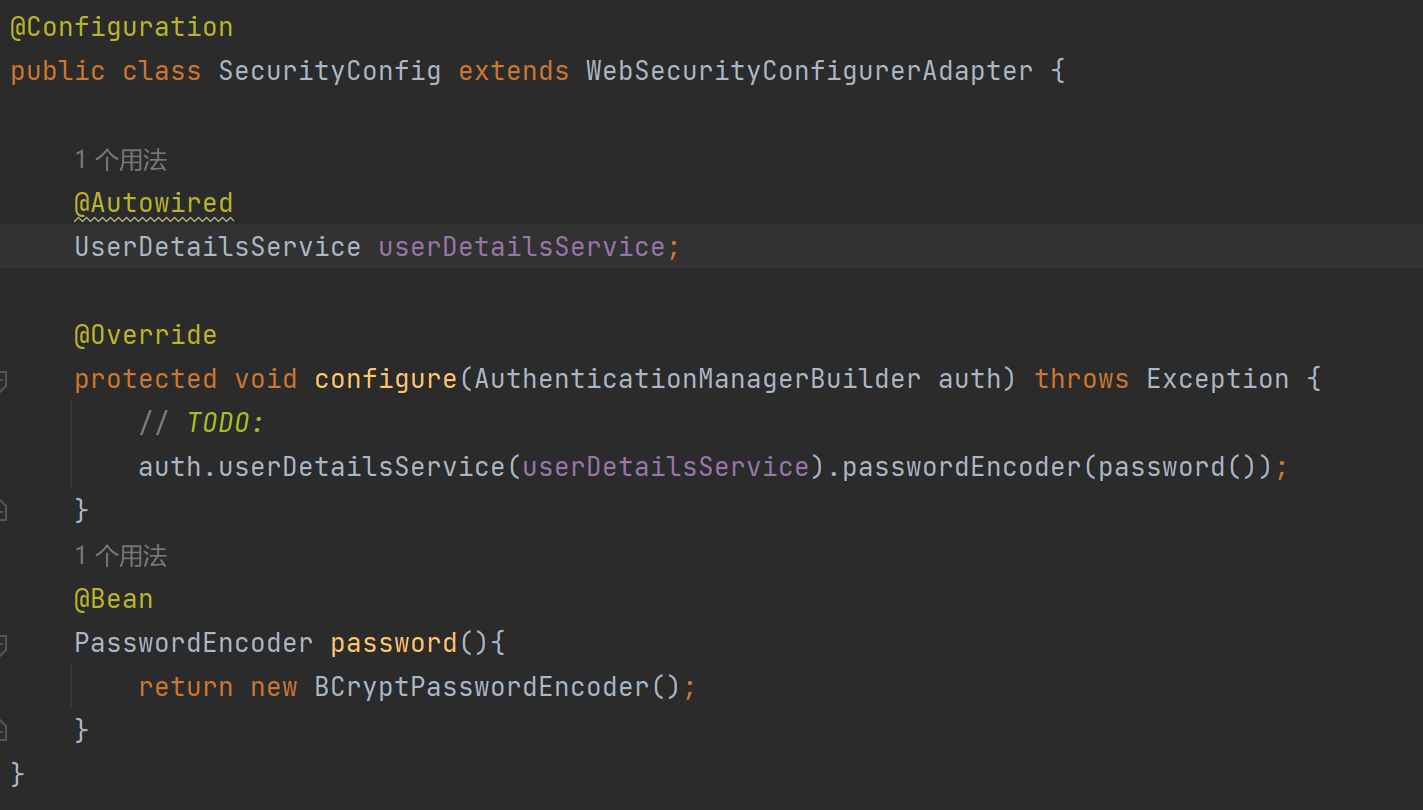
2. 配置类实现
package com.example.springbootstudy.config;
import org.springframework.context.annotation.Bean;
import org.springframework.context.annotation.Configuration;
import org.springframework.security.config.annotation.authentication.builders.AuthenticationManagerBuilder;
import org.springframework.security.config.annotation.web.configuration.WebSecurityConfiguration;
import org.springframework.security.config.annotation.web.configuration.WebSecurityConfigurerAdapter;
import org.springframework.security.crypto.bcrypt.BCryptPasswordEncoder;
import org.springframework.security.crypto.password.PasswordEncoder;
@Configuration
public class SecurityConfig extends WebSecurityConfigurerAdapter {
@Override
protected void configure(AuthenticationManagerBuilder auth) throws Exception {
// 必须创建,不然会找不到bean
BCryptPasswordEncoder encoder = new BCryptPasswordEncoder();
String password = encoder.encode("123456");
auth.inMemoryAuthentication().
withUser("hypervoid").
password(password).
roles("admin");
}
/**
* 需要创建bean,不然会无法登录
* @return
*/
@Bean
PasswordEncoder passwordEncoder(){
return new BCryptPasswordEncoder();
}
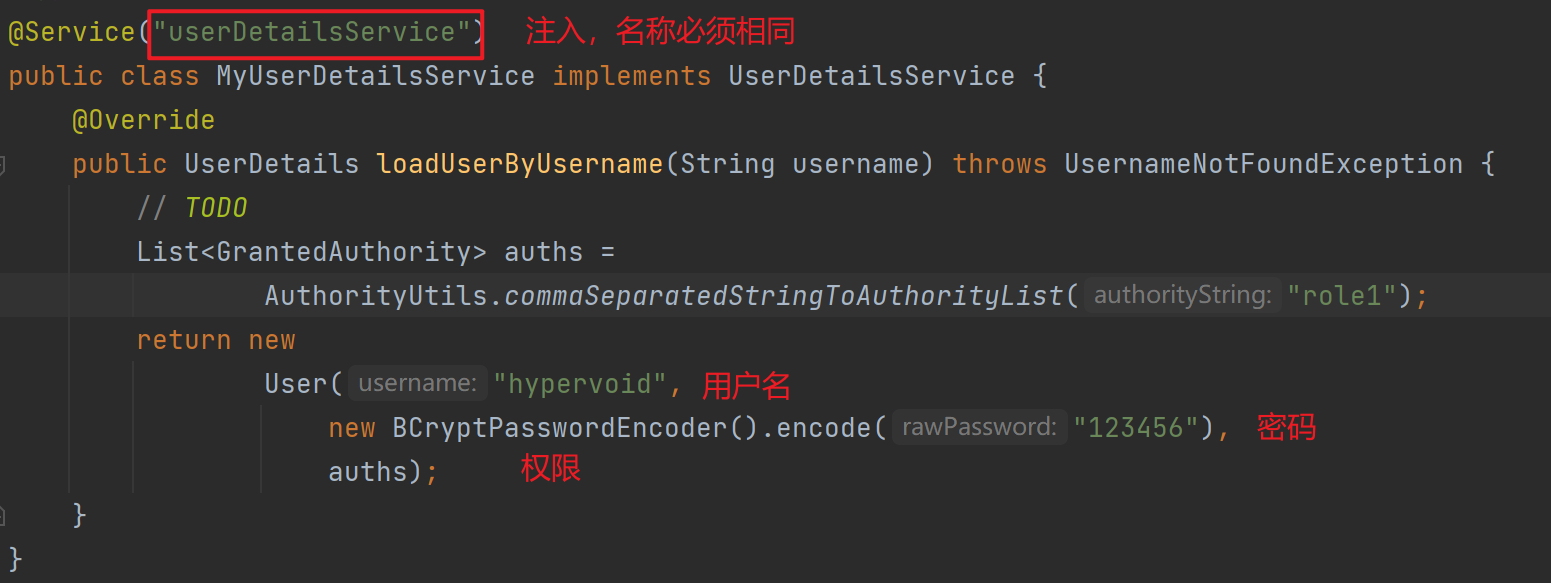
}3. 自定义实现类
需要自定义用户名密码实现类
步骤:
- 创建配置类,设置使用哪一个UserDetailService实现类
- 编写实现类,返回user对象,user对象包含用户名密码以及操作权限
查询数据库
-
添加mysql、mybatis(plus)、lombok三个模块
-
创建数据库表,配置数据库连接
-
创建对应 实体类、mapper
-
在
MyUserDetailsService中查询数据库,进行用户认证
数据库表:
-- auto-generated definition
create table user
(
    username     varchar(256)                       null comment '用户昵称',
    id           bigint auto_increment comment 'id'
        primary key,
    userAccount  varchar(256)                       null comment '账号',
    avatarUrl    varchar(1024)                      null comment '用户头像',
    gender       tinyint                            null comment '性别',
    userPassword varchar(512)                       not null comment '密码',
    phone        varchar(128)                       null comment '电话',
    email        varchar(512)                       null comment '邮箱',
    userStatus   int      default 0                 not null comment '状态 0 - 正常',
    createTime   datetime default CURRENT_TIMESTAMP null comment '创建时间',
    updateTime   datetime default CURRENT_TIMESTAMP null on update CURRENT_TIMESTAMP,
    isDelete     tinyint  default 0                 not null comment '是否删除',
    userRole     int      default 0                 not null comment '用户角色 0 - 普通用户 1 - 管理员',
    planetCode   varchar(512)                       null comment '星球编号'
)
    comment '用户';
User实体类
/**
 * 用户
 * @TableName user
 */
@TableName(value ="user")
@Data
public class UserDomain implements Serializable {
    /**
     * id
     */
    @TableId(type = IdType.AUTO)
    private Long id;

    /**
     * 用户昵称
     */
    private String username;

    /**
     * 账号
     */
    private String userAccount;

    /**
     * 用户头像
     */
    private String avatarUrl;

    /**
     * 性别
     */
    private Integer gender;

    /**
     * 密码
     */
    private String userPassword;

    /**
     * 电话
     */
    private String phone;

    /**
     * 邮箱
     */
    private String email;

    /**
     * 状态 0 - 正常
     */
    private Integer userStatus;

    /**
     * 创建时间
     */
    private Date createTime;

    /**
     *
     */
    private Date updateTime;

    /**
     * 是否删除
     */
    @TableLogic
    private Integer isDelete;

    /**
     * 用户角色 0 - 普通用户 1 - 管理员
     */
    private Integer userRole;

    /**
     * 星球编号
     */
    private String planetCode;

    @TableField(exist = false)
    private static final long serialVersionUID = 1L;
}
UserMapper:
package com.example.springbootstudy.mapper;

import com.baomidou.mybatisplus.core.mapper.BaseMapper;
import com.example.springbootstudy.domain.UserDomain;
import org.apache.ibatis.annotations.Mapper;


public interface UserMapper extends BaseMapper<UserDomain> {

}升级MyUserDetailsService:
@Service("userDetailsService")
public class MyUserDetailsService implements UserDetailsService {
    @Autowired
    private UserMapper userMapper;

    @Override
    public UserDetails loadUserByUsername(String username) throws UsernameNotFoundException {
        // 调用 UserMapper 查询数据库
        LambdaQueryWrapper<UserDomain> qw = new LambdaQueryWrapper<>();
        // 按照用户名查询
        qw.eq(UserDomain::getUsername, username);
        UserDomain user = userMapper.selectOne(qw);
        if(user == null){
            // 数据库中不存在用户
            // 认证失败
            throw new UsernameNotFoundException("用户名或密码错误");
        }
        List<GrantedAuthority> auths =
                AuthorityUtils.commaSeparatedStringToAuthorityList("role1");
        return new
                User(user.getUsername(),
                    new BCryptPasswordEncoder().encode(user.getUserPassword()),
                    auths);
    }
}
自定义登录页面
不需要登录
配置类 SecurityConfig 中实现相关配置
@Override
protected void configure(HttpSecurity http) throws Exception {
    http.formLogin() // 定义登录时转到登陆页面
            .loginPage("/login.html")
            .loginProcessingUrl("/user/login") //定义登录表单提交到哪个 Controller
            .defaultSuccessUrl("/test/index") // 登陆成功页面
            .permitAll()
            .and()
            .authorizeRequests() // 那些url方法被保护
            .antMatchers("/", "/test/hello", "/user/login") // 不需要认证,直接访问的路径
            .permitAll()
            .anyRequest().authenticated() //运行所有登录的可以访问
            .and().csrf().disable(); // 关闭 CSRF 防护
}
创建自定义的登陆页面
<!DOCTYPE html>
<html lang="en">
<head>
    <meta charset="UTF-8">
    <title>login</title>
</head>
<body>
  <form action="/user/login" method="post">
    <label>
      用户名:
      <input type="text" name="username" value="hypervoid">
    </label>
    <br>
    <label>
      密码:
      <input type="password" name="password" value="123456">
    </label>
    <br>
    <input type="submit" value="login">
  </form>
</body>
</html>